

EAN:4260195433168
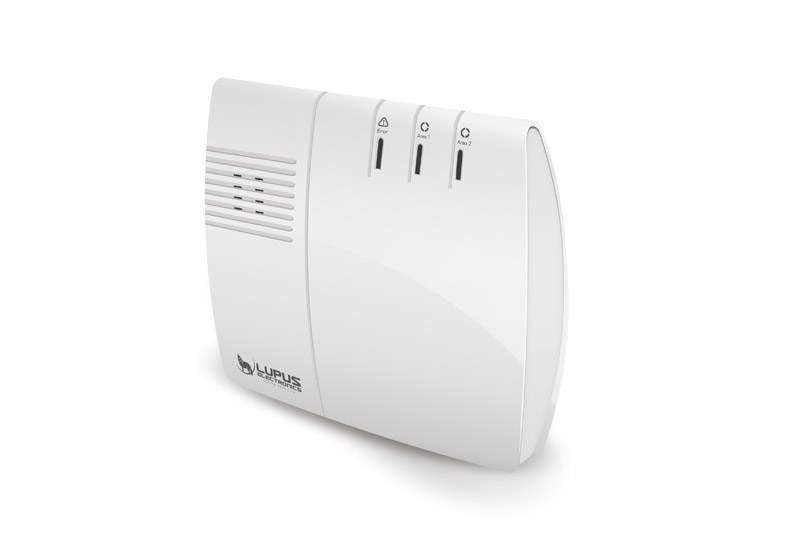
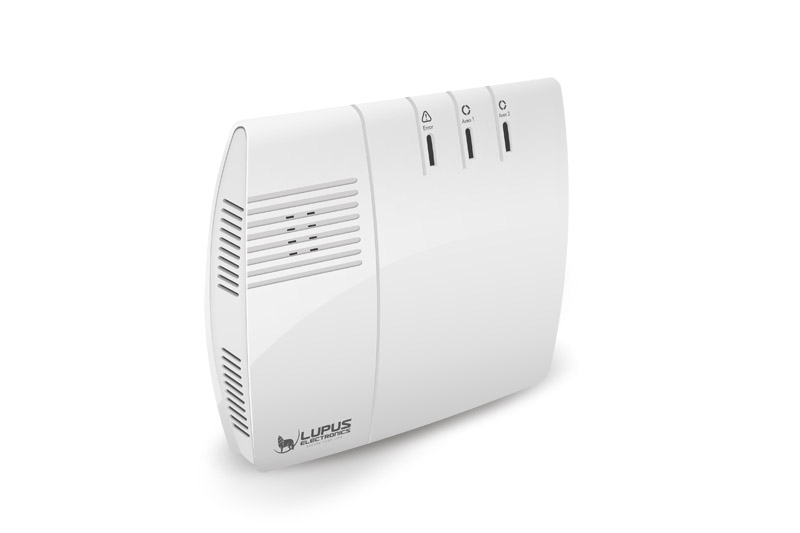
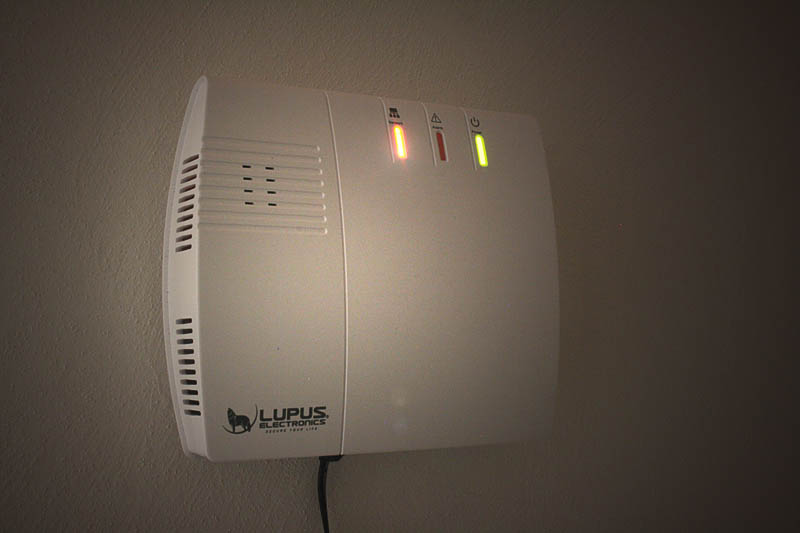
LUPUS - XT2 Plus Main Panel
- Description
-

LUPUS XT2 Plus
Alarm system, video surveillance, smart home. The all-in-one solution.

LUPUS XT2 Plus. Alarm. Video. Smart home. Easy and secure.
The LUPUS XT2 Plus is one of the most modern systems for building security, video surveillance, and smart home control. Reliability, useability, and versatility turn the XT2 plus into the operating system of your building.
The simple installation process of the XT2 Plus grants you protection against intruders, burglars, and other dangers without structural changes to your building. The XT2 Plus can control your heating, lights, shutters, and electronics devices. The integration of live video surveillance allows you to always check what is going on.
The alarm panel is impregnable since it uses a 256bit SSL encryption for any data transmission. The communication between the alarm panel and your device (e.g. smartphone) is always a direct one. As a result, your data stays where it belongs: at your home!
The LUPUS XT2 Plus is a revolutionary smart home system.
The LUPUS XT2 Plus is the perfect operating system for your home. It can control and automate your lights, shutters, and electrical devices. The simple and intelligent software allows you to connect all these functions which each other. For example, when you leave your home in the morning and arm the alarm system, you can define that the heating is lowered and your standby devices are completely switched off. This allows you to save money and protects the environment. Once defined, everything happens automatically in the background every day. The possibilities of the home automation are only limited by your imagination. Do you want to create a precipitation or moisture dependent watering of your garden? Do you want to create a presence simulation with time dependent light and shutter actions during your vacation? All of this is possible.
And many more things as well, with the innovative LUPUS XT2 Plus.


LUPUS XT2 Plus is a professional and secure alarm system.
The LUPUS Xt2 Plus protects you and your building against every intruder. You can connect up to 240 alarm sensors wirelessly to the XT2 Plus. The LUPUS alarm sensors detect any intruder and trigger an alarm.
Additionally, sensors that detect, fire, water, gas, and other emergencies are available. That allows you to receive alarms on your smartphone in case of smoke detection no matter where you currently are. That protects you life when your are at home and helps you to prevent damages when you are not at home.
Prevent damages, Preventive. Easy and secure. The new LUPUS XT2 Plus.
The LUPUS XT2 Plus is easy to use.
The new LUPUS XT2 Plus allows you to access all settings via computer, tablet, or smartphone with your webbrowser or app. A secure 256bit SSL data encryption is always active and protects the connection between the devices.
Do you want to change the alarm systems status while away? Do you want to change the temperature in your room? Do you want to switch on your outdoor lights? Do you wnt to check if all your doors and windows are closed? No problem – a single clikc on your smartphone is enough and you can enjoy the rest of the day.
What happens if your smartphone is off or you are not reachable? No problem!!
Connect your LUPUS XT alarm panel with a professional alarm service centre by LUPUS 24 and Stadtritter
Perfect for your home, empty offices, shops, or restaurants. The LUPUS 24 alarm service connects your XT alarm panel to the state-of-the-art alarm service centre of Stadtritter.
The LUPUS 24 alarm service also reacts if you are not reachable.
In case of an alarm, your five most important contacts are called in the very second of the alarm. Then, it is decided if the police, emergency doctors, or firefighters need to be called to your building. The premium contract also offers on-premises emergency personal of the alarm service centre.
Of course, you can also connect to other alarm service centres with a world-wide standardised contact ID protocol.

LUPUS XT2 Plus means to be at home while on the road.
In case of an alarm, the XT2 Plus notifies you via push-notification, E-Mail, SMS, or phone call. Additionally, all alarms can be transmitted to an alarm service centre. This is possible via your internet connection and the GSM module of the alarm panel.
Of course, you can also integrate video surveillance solutions and IP-cameras from LUPUS and many other manufacturers in the interface of your LUPUS XT2 Plus. Thus, you can check what is going on at your building after you have received an alarm. Easy, simple, and secure!
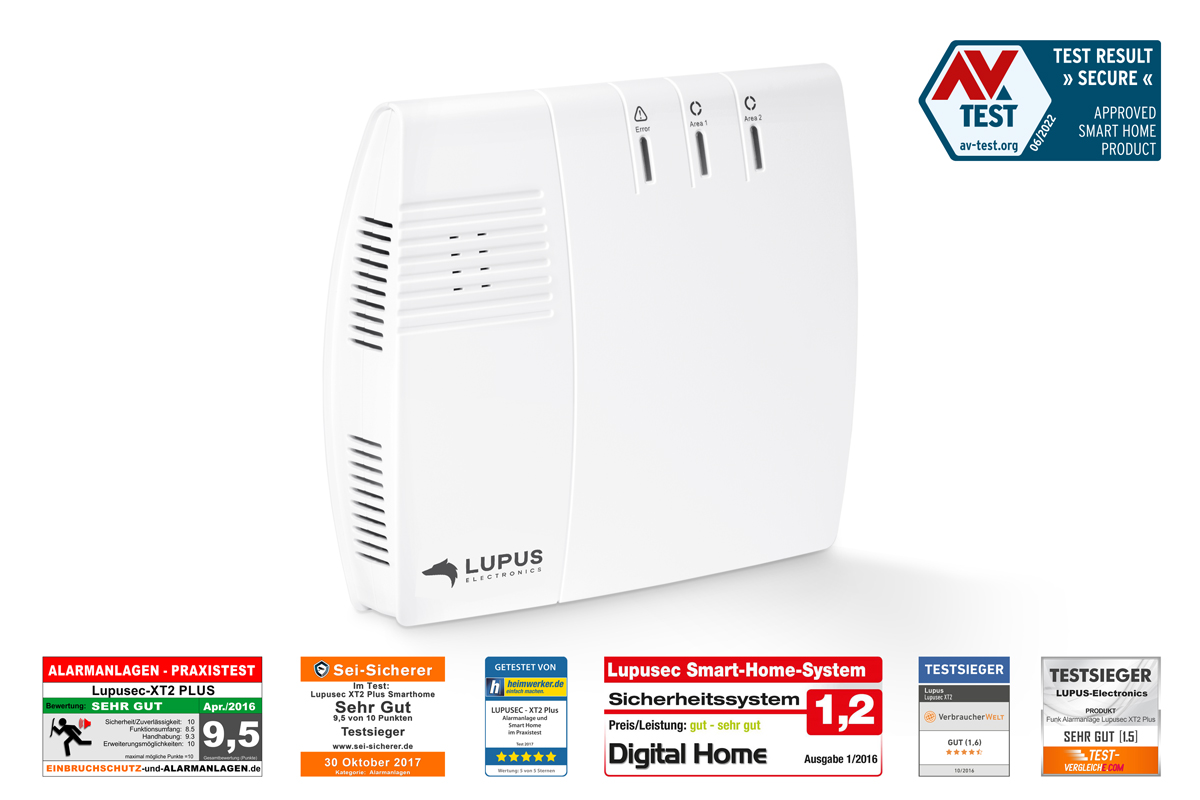
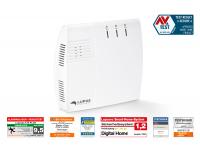
On www.einbruchschutz-und-alarmanlagen.de our XT2 alarm panel won the test (April 2016).
You can find the complete test that website.
The comparison portal www.test-vergleiche.com tested five wireless alarm panels and the result was: winner XT 2 Plus!
- Tech. Data
-
LUPUS - XT2 Plus Main Panel
Technical data:
Dimensions 175 x 150 x 40mm (6.8 x 5.9 x 1.5 inches) Weight 0.56 kg (1.23 pounds) Maximal amount of sensors 240 (2 areas with 120 sensors each and 3 home modes)
Max. 40 ZigBee devices - a ZigBee repeater allows you to add more devices per used repeaterMaximal amount of devices Wireless relay 12014 – no limitation
Wireless repeater V1 – up to 10
Wireless repeater V2 – counts as a sensorMaximal amount of PIR network cameras 6 Maximal amount of analogue / digital cameras 8 (e.g. LUPUSNET HD series or LUPUSTEC - recorder) Tampering protection of the sensors displayed in the web interface Yes Status display in the web interface Yes Battery status of the sensors displayed in the web interface Yes Internal storage of images Yes, saves up to 3 images of the PIR network camera per alarm FTP / E-mail image upload Yes Alarm methods Contact-ID via GPRS, TCP/IP, E-mail, phone call or SMS Access via PC (Webbrowser), MAC (Webbrowser), Android / Apple smartphones and tablets (LUPUSEC App) Encryption SSL / TLS 1.2 SHA-256bit with RSA-encryption ZigBee protocol ZBS v2.9.2.6.1 Radio frequency 868,6625 MHz (Dual Way) and 2.4GHz (Dual Way) Radio performance RF: max. 16mW (12dBm)
ZigBee: max. 100mW (20dBm)Transmission range Approx. 30 to 100m (32 to 109 yards) depending on the local conditions, expandable via repeater Modulation FM Mounting options Wall, table Power supply 1100 mAh Ni-mh rechargeable emergency battery, 12V DC Operating temperatures -10 to +45°C (14F - 113F) Maximal humidity Up to 90% (not condensing) Conforms to the following standards CE, FCC, RoHs Options Arm, disarm, 2 areas, home modes 1+2+3, silent alarm, fire alarm, medical alarm, CO alarm, check panel status, alarm signalling Available accessories We offer more than 30 accessories and more than 20 smart home modules for various uses. Languages (web browser) German, French, English, Spanish, Italian Internal siren Yes, 99dB Remote access via PC (web browser), MacOS (web browser), iPhone (APP), and Android (APP) Sim card format Mini-SIM - 4G Security service centres / software that support the XT2 Plus Alec Sicherheitssysteme GmbH, Sicherheit-Nord GmbH & Co KG, INSOCAM's AM/Win, Bavaria Werkschutz GmbH Policy compliance EN 300220-1&2/EN 300328/EN 301489-1&3&17/EN 60950-1/EN 62311 Guaranteed software updates (in accordance with VDP) For six years after date of sale Includes:
LUPUSEC XT2 Plus alarm panel Wall mount Screws and dowels Manual - Videos
-
- Downloads
-
DesignationTypeSizeDateDescriptionLUPUSEC - XT2 Benutzerhandbuch auf FranzösischPDF7.9 MB26.3.2021Französisches LUPUSEC - XT2 Benutzerhandbuch 2.14Handbuch - LUPUSEC XT2 auf SpanischPDF7.82 MB26.3.2021Spanisches LUPUSEC - XT2 Benutzerhandbuch 2.14Software - Lupus IP Finder für WindowsZIP5.2 MB24.2.2022IP Kamera Finder zum Suchen, Einrichten und Updaten der Lupusnet HD Kameras, Rekorder + LUPUSEC Alarmzentralen Version 1.0.13Software - Lupus IP Finder für Mac OSPKG235 KB29.4.2021IP Kamera Finder zum Suchen und Einrichten der Lupusnet HD Kameras, Rekorder + LUPUSEC Alarmzentralen Version 1.3CD Inhalt - LUPUSEC AlarmanlageZIP62.35 MB28.11.2016CD Inhalt - LUPUSEC Alarmanlage ohne VideosFirmware - LUPUS XT2+ & XT1+ (Erste Version)BIN7.42 MB12.6.2026XT1+ & XT2+ (Erste / Ältere Hardwareversion) Firmware HPGW-G 0.0.3.7J (Mehrsprachig). Bitte stets nach dem Update den Browser Cache löschenFirmware - LUPUS XT MAX CPU (Neuste Version)BIN12.72 MB19.5.2026XT1+/XT2+ (latest hardware version with MAX CPU) and XT4 firmware HPGW-MAX2 0.0.3.7J (multilingual). Please always delete the browser cache after the update
- FAQ
-
Frequently Asked Questions - What do I have to do to get remote access to my Lupus device?
- How do I activate the Lupus ddns service in my Fritz!Box?
- Which App can I use?
- Why is the email notification not working?
- How do I integrate the live stream of my LE200 into my XT alarm panel?
- LE 9xx camera - How can I connect my LE9xx IP camera with my XT alarm panel?
- Is it possible to display the MJPEG stream of the HDTV recorder in the alarm panel?
- The XT main unit sounds every 30 seconds.
- Why do I always need two attempts to arm my alarm panel?
- How do I correctly set up a home automation rule?
- I still receive push notifications of an alarm panel after I have deleted the profile in my app.
- Which sensor is compatible with my XT alarm panel?
- Which functions of my camera can be controlled by my XT alarm panel?
- Camera integration of other manufacturers - type of authentication
- Does the mini indoor siren Plus support the doorbell function?
- How do I setup a simulation of presence?
- Is the autmatic door lock "Nuki" supported by the XT2 Plus panel?
- Keypad - I cannot arm my alarm panel with the code 0000.
- Outdoor and indoor siren do not sound an alarm
- PIR motion detector - trouble shooting
- The outdoor siren (V1) does not stop
- Userinterface extrem slow - Avast what to do?
- Userinterface extrem slow - Kaspersky what to do?
- Why does Safari not accept the SSL certificate?
- Why does the alarm panel still display low battery after I have changed the batteries of a sensor?

What do I have to do to get remote access to my Lupus device?
P2P connection
All current LUPUS devices support P2P connection. A port forwarding or DDNS address is no longer necessary if you use our app for the remote access.
Below the old and now longer necessary manuals if you still want to use port forwarding and DDNS:
How can I access my router? (Due to P2P now longer necessary)
In order to gain access to your devices via the internet, you have to set up a port forwarding in your router. In case you do not know the IP address of your router, you can find in the following way:
Windows PC MAC - Start the command interface
Type in "cmd" in the start menu (without quotation marks)- Type in “ipconfig”
- Standardgateway is the IP address of your router
- Open the system settings
- Click on network
- Select your current network connection (Ethernet or WLAN)
- The tab TCP/IP lists the IP address of your router
How do I set up a port forwarding in my router? (Due to P2P now longer necessary)
*Currently, there are only German manual availableHow do I access my device? (Due to P2P now longer necessary)
After you have created a port forwarding as described in the manuals above, you can access your device by typing in the following address in your web browser:
https://YourName.lupus-ddns.de:ExternalPortThe real command would look similar to the following:
https://demoxt2.lupus-ddns.de:53080
http://demoxt1.lupus-ddns.de:10000Which port do I need to forward in my router? (Due to P2P now longer necessary)
In the following table, the internal ports of our devices are listed:
Device Internal port XT1 / XT2 80 XT2 Plus 443 (SSL encrypted - recommended) or 80 (not encrypted) LE 9xx cameras 80 LE 200 80 (older firmware versions 88) LE 201 / LE 203 TCP 80, TCP 37777, TCP 1935, and UDP 37778 (see FAQ LUPUSTEC → General → "Required port forwarding for an access via internet") Recorder HDTV / NVR / HD-SDI TCP 80 and TCP 37777 and UDP 37778 (see FAQ LUPUSTEC → General → "Required port forwarding for an access via internet") Change the standard password of any device you allows to be accessed from the internet!
last updated - 11/27/2024 last updated - 04/05/2017 last updated - 03/17/2021 Why is the email notification not working?
General
Please make sure that your IP settings are correct. If you are in doubt, please set the alarm panel to DHCP.
Some routers have a list of secure e-mail servers (e.g. speedport of the German Telekom) that might block some e-mail providers if it is active. If your router has a similar function, please deactivate it.Which e-mail providers work with my XT?
We tested selected popular and free e-mail providers. If a provider is not listed, it only means that we did not test this provider – it does not mean that the provider does not work.
Provider XT1 XT1 Plus / XT2 (Plus) / XT3 / XT4 LE201/202/203/204 LE 9xx LUPUSTEC HDTV & NVR recorder Gmail +
smtp.gmail.com
(TLS Port 587) - allow access of less secure apps+
smtp.gmail.com
(TLS Port 587) - allow access of less secure apps+
smtp.gmail.com
(TLS Port 587) - allow access of less secure apps
Attachment: Yes+
smtp.gmail.com
(TLS Port 587) - allow access of less secure apps
Attachment: Yes+
smtp.gmail.com
(TLS Port 587) - allow access of less secure apps
Attachment: YesYahoo +
smtp.mail.yahoo.com
(SSL Port 465) - Allow apps that use less secure log in+
smtp.mail.yahoo.com
(SSL Port 465) - Allow apps that use less secure log in+
smtp.mail.yahoo.com
(SSL Port 465) - Allow apps that use less secure log in
Attachment: Yes+
smtp.mail.yahoo.com
(SSL Port 465) - Allow apps that use less secure log in
Attachment: Yes+
smtp.mail.yahoo.com
(SSL Port 465) - Allow apps that use less secure log in
Attachment: YesFreenet - +
mx.freenet.de
smtp e-amil sending needs to be enabled
Port 465 or 587+
mx.freenet.de
smtp e-amil sending needs to be enabled
Port 587 (TLS)
Attachment: Yes+
mx.freenet.de
smtp e-amil sending needs to be enabled
Port 587 (TLS)
Attachment: Yes+
mx.freenet.de
smtp e-amil sending needs to be enabled
Port 587 (TLS)
Attachment: YesMail.de - +
smtp.mail.de
Port: 465 SSL+ / -
smtp.mail.de
Port: 465 SSL
Attachment: No+
smtp.mail.de
Port: 465 SSL
Attachment: Yes+
smtp.mail.de
Port: 465 SSL
Attachment: YesGMX - +
mail.gmx.net
(TLS Port 587) - allow e-mails to be send by third party devices+
mail.gmx.net
(TLS Port 587) - allow e-mails to be send by third party devices
Attachment: Yes- +
mail.gmx.net
(TLS Port 587) - allow e-mails to be send by third party devices
Attachment: YesWeb.de - +
smtp.web.de
(TLS Port 587) - allow e-mails to be send by third party devices+
smtp.web.de
(TLS Port 587) - allow e-mails to be send by third party devices
Attachment: Yes- +
mail.gmx.net
(TLS Port 587) - allow e-mails to be send by third party devices
Attachment: YesOutlook / Hotmail - - - - - Telekom - +
securesmtp.t-online.de
(SSL Port 465) - You need to set a separate e-mail password
Not recommended for security reasons: Telekom does only allow you to send 100 mails per day (and not more than 1000 per month).+
securesmtp.t-online.de
(SSL Port 465) - You need to set a separate e-mail password
Not recommended for security reasons: Telekom does only allow you to send 100 mails per day (and not more than 1000 per month).
Attachment: Yes- +
securesmtp.t-online.de
(SSL Port 465) - You need to set a separate e-mail password
Not recommended for security reasons: Telekom does only allow you to send 100 mails per day (and not more than 1000 per month).
Attachment: YesWeb.de and gmx.de are owned by 1&1. Hence, 1&1 should work accordingly with the corresponding 1&1 smtp server.
Outh owns Yahoo and AOL. Hence, AOL should work like Yahoo with the corresponding AOL smtp server.
last updated - 05/20/2025 How do I integrate the live stream of my LE200 into my XT alarm panel?
In order to integrate the live stream of you LE200 into the XT alarm panel, you need to install the latest firmware update of the camera and set the sub-stream compression to MJPEG
Please use the following command to integrate the camera:
- http://IP-ADRESSLE200:PORT/cgi-bin/CGIStream.cgi?cmd=GetMJStream&usr=USERNAME&pwd=PASSWORD
last updated - 03/22/2017 LE 9xx camera - How can I connect my LE9xx IP camera with my XT alarm panel?
Since firmware 3.0 the XT features a network search option. Simply start the network search in the menu "Smarthome" → "Camera", select your camera, and enter username and password
A video manual (currently only in German) can be found hier.
Old method
NO LONGER NECESSARY WITH LATEST FIRMWARE
You can integrate the live stream of your IP camera into the XT alarm panel with the following command:- http://username:password@MyCamera.lupus-ddns.de:PORT/GetData.cgi?CH=02
You can also use the following command to send username and password as a parameter (some browsers require this syntax):
http://MyCamera.lupus-ddns.de:Port/GetData.cgi?CH=02&usr=USERANME&pwd=PASSWORD- username - Username of the camera
- password - Password of the camera
- MyCamera.lupus-ddns.de - please insert your DDNS address or the local IP address of the camera here
- Please note: if you choose the local IP address, the live stream can only be displayed while you are connected with your local network.
- 1000 - please insert the external port you selected for the port forwarding of the camera in your router (only access via DDNS) or the local port of the camera (only local access).
Please note: Streaming 2 needs to be activated in the video settings of the camera.
Please note: the live stream cannot be displayed in Internet Explorer.
Please note: The LUPUSNET HD - LE200 requires a different command:
- http://IP-AdresseLE200:PORT/cgi-bin/CGIStream.cgi?cmd=GetMJStream&usr=USERNAME&pwd=PASSWORD
You can integrate any IP camera that has an MJPEG stream. Please contact the manufacturer of your camera to ask for the required command to access this stream.
last updated - 02/16/2022 Is it possible to display the MJPEG stream of the HDTV recorder in the alarm panel?
Yes, please use the following syntax:
- http://username:password@IP-address/cgi-bin/mjpg/video.cgi?channel=channelNo&subtype=1
Example with a standardised IP address, username and passwort:
- http://admin:admin@192.168.123.101/cgi-bin/mjpg/video.cgi?channel=1&subtype=1
Please note that this requires the latest firmware of the recorder and that your need to set the compression of the extra stream in the recorder to MJPEG.
last updated - 09/14/2020 The XT main unit sounds every 30 seconds.
There are one or multiple failures listed under "System" → "Status" → "Panel" here you can choose "Ignore" to continue normal operation.
last updated - 05/27/2019 Why do I always need two attempts to arm my alarm panel?
If you cannot arm the alarm panel on the first attempt (e.g. via remote control or keypad) and you hear to different signal tones, the alarm panel notifies you about a problem. This could be an open door contact, open tampering protection, or a low battery, etc..
You can override this warning and force the arming of the alarm panel by enabling the arm mode again within 10 seconds.
last updated - 03/21/2017 How do I correctly set up a home automation rule?
To set up a home automation rule, several steps are necessary:
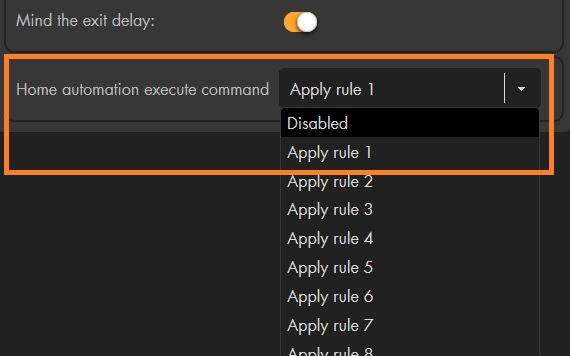
- Open the menu "Sensors" → "List" → "Sensors" and press on "edit" (cogwheel) next to the sensor that shall trigger the home automation rule.
If you want to set up a rule that is not triggered by a sensor, please skip this step.
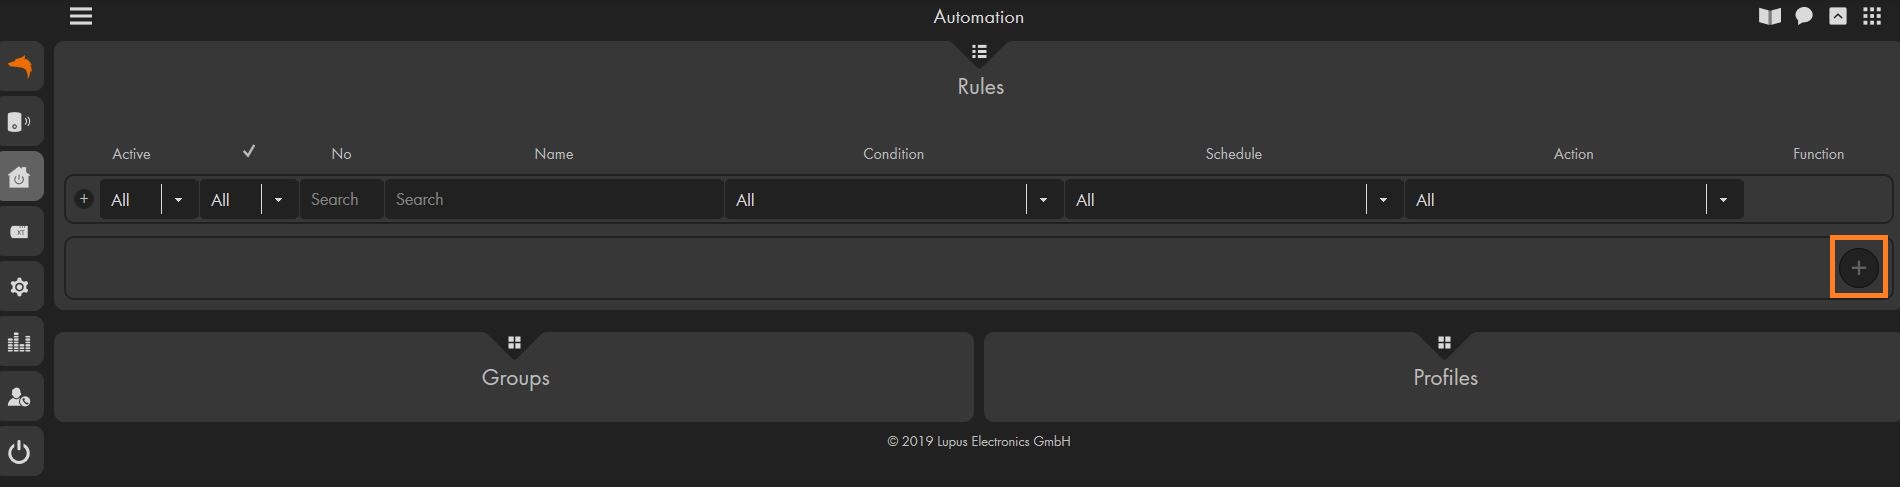
In the row "Home automation execute command," you can now define e.g. "Apply rule 1". - Open the menu "Smarthome" → "Automation" → "Rules" and create a new rule by pressing on the "+" symbol.
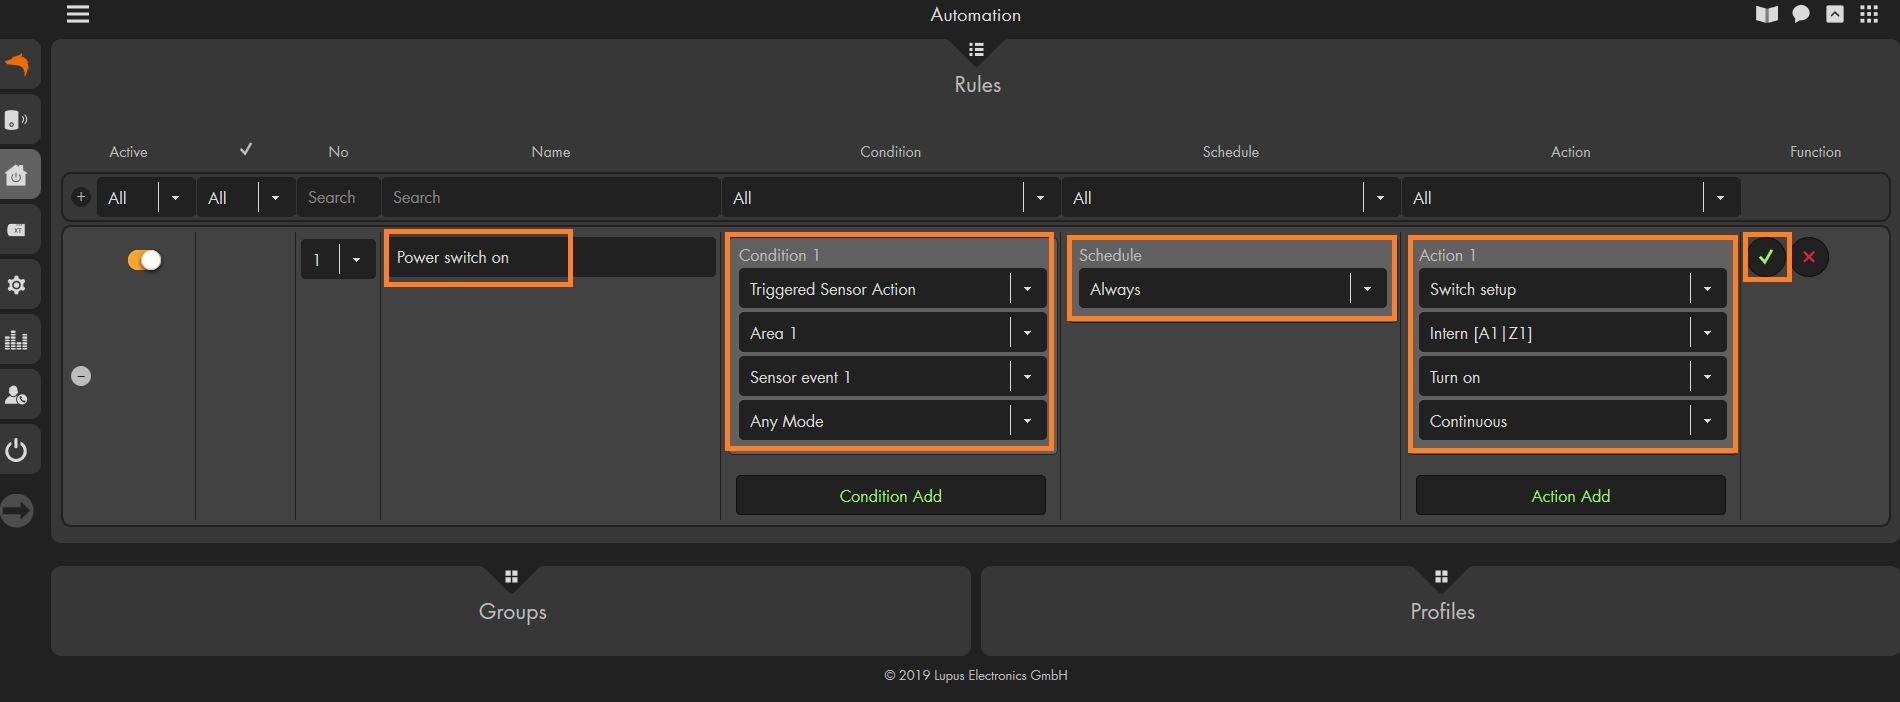
- You can now define a name for this automation. This will help you to identify the function of the automation later on.
In the column "Condition," you can set up a condition which will trigger the home automation. To use the "Rule 1" which we defined in the sensor above, please select "Triggered sensor action" and "Sensor event 1."
The "Schedule" allows you to define a time condition for this rule. If you select "always," this automation will always be performed when the condition is fulfilled.
The "Action" is the automation you want to perform if your condition and schedule settings are fulfilled.
In this example, every time our door contact triggers the sensor event 1, a wireless plug is switched on.
If you want that more than one condition needs to be fulfilled to trigger an automation, you can add additional conditions by pressing on the "+" symbol in the condition column. The same can be done to trigger multiple actions.
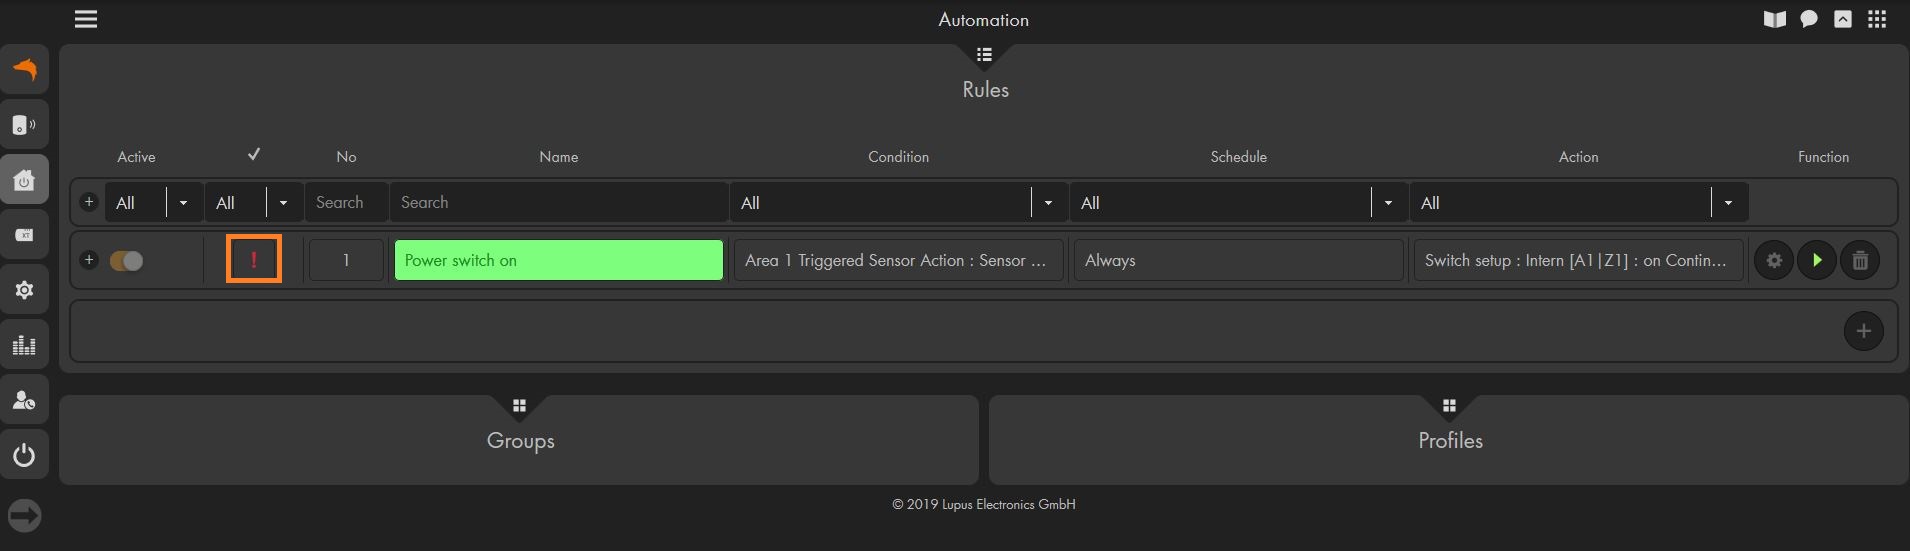
Click on the checkmark to create this rule. - Right now, this rule is not active – this is depicted by the red exclamation mark left to the number of the automation. This means that this rule is not part of the currently active profile.
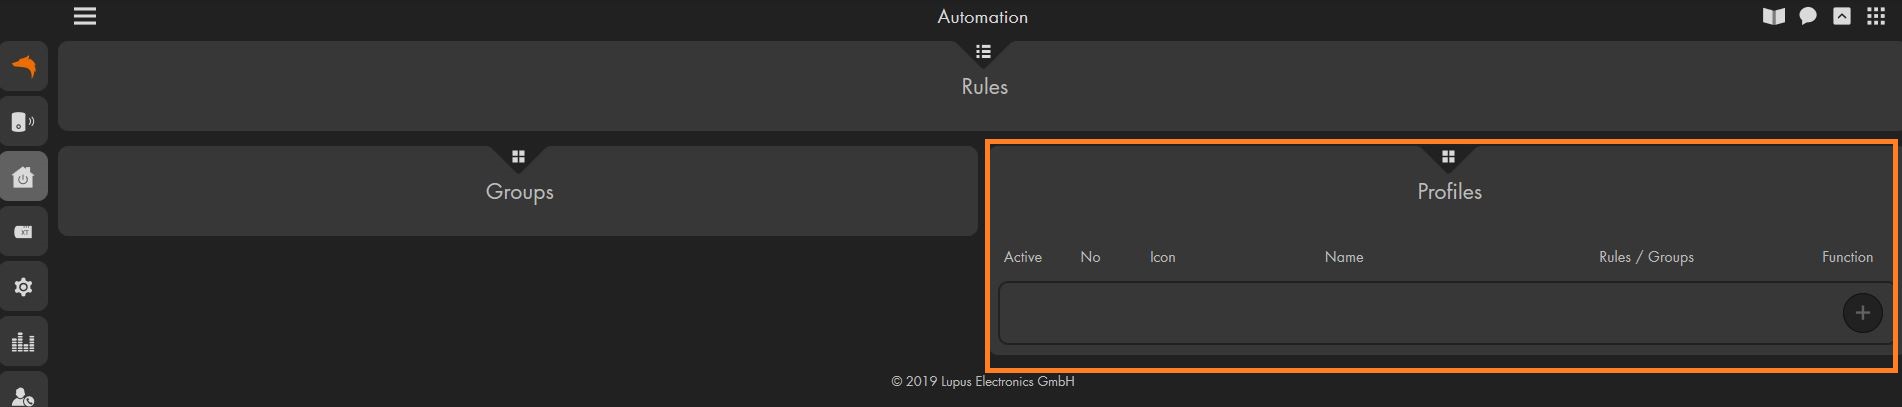
- To manage your profiles, use the pull down menu "Profiles"
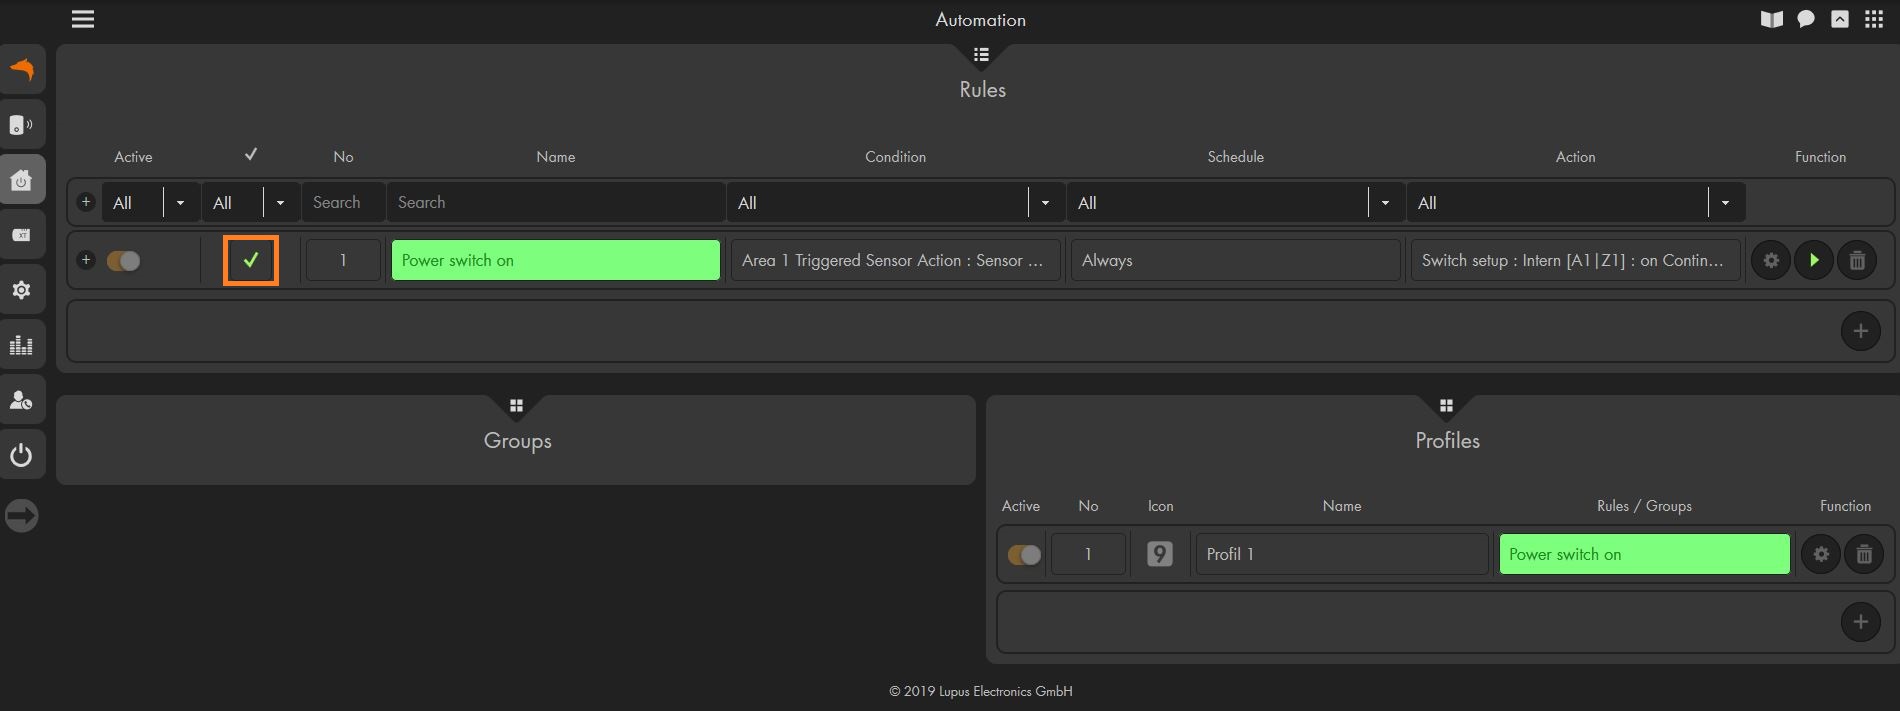
If have not already set up a profile, please click on the "+" symbol to create a new one. - Assign a name to your profile and add the rule we created above in the column "rules / groups."
Click on the checkmark when you are done. - In the image below, you see a finished rule that is assigned to an active profile. Additionally, a green checkmark is displayed next to the rule to show that this rule is currently active.

last updated - 05/27/2019 I still receive push notifications of an alarm panel after I have deleted the profile in my app.
In order to turn off the push notifications of your XT, you need to add the XT again to your LUPUS app. After you have reconnected the alarm panel to the app, go to the menu "Notifications" in your app and disable the push notifications for this smartphone. Afterwards, you can delete the profile of the alarm panel from your app.
Alternatively, someone else who is still connected to the XT can delete your smartphone from the list in the notifications menu.
last updated - 12/03/2021 Which sensor is compatible with my XT alarm panel?
XT sensor compatibility
Product Item No. XT1 XT2 XT1 Plus
XT2 Plus
XT2 with Dongle
XT3XT4 Alarm sensors
Door contact (blanc) 12002 + + + + PIR motion detector 12003 + + + + Smoke detector 12004 + + + + Water sensor 12007 + + + + Medical emergency controller 12009 + + + + Glass breaking sensor 12011 + + + + PIR network camera 12012 + + - - Panic button 12015 + + + +
Wireless repeater 12016 + + + +
Heat detector 12018 + + + + CO detector 12019 + + + + Sensor input 12020 + + + + Dual way motion detector 12034 + + + + Door contact (marron) 12037 + + + + Door contact (anthracite) 12038 + + + + PIR network camera V2 12041 - - + + Water sensor V2 12047 - - + + PIR network camera V3 12073 - - + + Glass breaking sensor V2 - ZB Version 12103 - - + + Glass breaking sensor V2 - RF Version 12103 - + + + Vibration sensor 12105 - + + + Curtain motion detector 12110 + + + + 360° motion detector 12111 + + + + Door contact V2 (white) 12113 + + + + Door contact V2 (brown) 12114 + + + + Door contact V2 (anthracite) 12115 + + + + PIR motion detector V2 12116 + + + + Smoke detector V2 12117 + + + +
Wireless repeater V2 12122 + + + +
Emergency button 12123 + + + + Sensor input (9 fold) 12125 - + + + PIR motion detector Pro 12201 - - - + Outdoor motion detector Pro 12202 - - - + Door contact Pro (blanc) 12203 - - - +
Hidden Door contact Pro (white) 12204 - - - +
Wireless Repeater Pro 12205 - - - +
Smarthome / Home automation
Wireless power supply device 12010 + - - - Temperature sensor 12013 + + - - Wireless relay 12014 + + + +
Temperature sensor with display 12021 - + - - Wireless power supply device with power meter 12022 + + - - Relay with power meter 12023 + + - - Relay 12024 + + - - Lockswitch contact 12026 + + + + Relay with dimmer V2 12030 - - + + Shutter relay 12031 - - + + Magnetic lock 12035 + + + + Mechanical lock 12036 + + + + Light switch 12046 - - + + Temperature sensor V2 12048 - - + + Temperature sensor with display V2 12049 - - + + Remote controlled mains socket with power meter and Zigbee repeater 12050 - - + + Relay with power meter V2 12051 - - + + 12/24V relay 12052 - - + + Radiator valve thermostat 12053 - - + + Scenario switch 12061 - - + + Universal IR controller 12062 - - + + Top-Hot relay DIN2 12063 - - + + Top-Hat relay DIN3 12064 - - + + Light sensor 12065 - - + + Electric meter 12071 - - + + Light switch V2 12072 - - + + Status display 12101 - - + + Scenario switch V2 12102 - - + + Wireless power device for XT1 12104 + - - -
Temperature sensor with external probe 12124 - - + + 1 channel relay with ZigBee repeater 12126 - - + + 2 channel relay with ZigBee Repeater 12127 - - + + Shutter relay V2 12128 - - + + Radiator valve thermostat V2 12130 - - + + Relay with power Relay with power meter V3 12131 - - + + Relais with dimmer V3 12132 - - + + Smart Plug 12133 - - + + Small ZigBee temperature sensor 12134 - - + + Control unit
XT Keypad 12001 + + + + Remote control 12008 + + + + Tag reader 12028 + + + + Outdoor Keypad 12070 +/-(please note FAQ) + + + Keypad V2 12106 - + + + Tag Reader V2 12107 - + + + Remote control V2 12108 - + + + Outdoor Keypad V2 12109 - + + + Remotecontroller V3 12118 - + + + Sirène
Indoor siren 12005 + + + + Mini indoor siren (eol) 12032 (eol) - + - - Small indoor siren V2 12032 - - + + Outdoor siren V2 12033 +/-(please note FAQ) + + + last updated - 03/06/2024 Which functions of my camera can be controlled by my XT alarm panel?
Funktionsübersicht XT1 Plus, XT2 (Plus), XT3, XT4 mit unseren verschiedenen Kameramodellen Kameramodell Bewegungserkennung an / aus E-Mailversand an/aus Daueraufnahme starten / stoppen Steuerbare Kamera kontrollieren:
PTZ Tour starten / stoppen
PTZ Postion anfahrenFlutlicht einschalten
Audiodatei abspielen
Kamerasirene auslösenIntelligente Bewegungserkennung an / aus Nutzerbar als Bedingung für Hausaution:
Bei Erkennung eines Menschen
Bei Erkennung eines Fahrzeugs202 Ja Ja Ja Nein Nein Nein Nein 203 Ja Ja Ja Ja Nein Nein Nein 204 Ja Ja Ja Nein Nein Nein Nein 221 Ja Ja Ja Nein Nein Ja (V1) Nein 224 Ja Ja Ja Nein Nein Ja (V1) Nein 228 Ja Ja Ja Nein Nein Ja (V1) Nein 232 Ja Ja Ja Nein Ja Ja(V2) Ja 281 Ja Ja Ja Ja Nein Nein Nein last updated - 01/20/2022 Camera integration of other manufacturers - type of authentication
When you add a camera of another manufacturer to your XT alarm panel, you need to mind the used authentication method:
A basic authentication commonly uses the structure "username:password@". In this case, please leave the option "Authentication via parameter" deactivated!
A digest authentication via parameter mostly uses a structure like "&user=username&password=password". In this case, please activate the option "Authentication via parameter".
last updated - 06/30/2020 Does the mini indoor siren Plus support the doorbell function?
Yes, the current mini indoor sirens (on the market since 2018) support the doorbell function!!
last updated - 08/25/2022 How do I setup a simulation of presence?
Automation: "Zufällige Auführung" Allgemein
Um eine Anwesenheitssimulation zu erstellen bietet die XT Zentrale die Möglichkeit einer zufälligen Ausführung eines Automationsbefehls. Dabei haben Sie die Wahl, ob die Automation garantiert in dem ausgewählten Zeitraum ausgeführt werden soll, oder ob diese nicht garantiert Ausgeführt werden soll.
Allgemein gilt für die Ausführung:
- Sie definieren in der Automation einen Zeitrahmen währenddessen die zufällige Ausführung stattfinden kann.
- In diesem Zeitrahmen wird die Wahrscheinlichkeit dann auf die einzelnen Minuten aufgeteilt. Das heißt, je länger der Zeitrahmen, desto geringer ist die Wahrscheinlichkeit der Ausführung pro Minute.
Bei einem Zeitintervall von 10 Minuten, hätte jede Minute eine Wahrscheinlichkeit von 10% die Automation zufällig auszulösen. - Bei einer garantierten Ausführung ist in der letzten Minute des Zeitraums die Ausführung garantiert (sollte die Ausführung nicht schon stattgefunden haben).
- Definieren Sie bitte immer einen Zeitraum! Ein undefinierter Zeitraum (z.B. "Immer") würde dazu führen, dass die Wahrscheinlichkeit der Ausführung für einen unbestimmten Zeitraum definiert wird und daher die Wahrscheinlichkeit der Ausführung pro Minute eshr gering ist.
Beispiel für eine Anwesenheitssimulation
Bedingung Zeitraum Aktion Zufällige Ausführung Jeden Tag 22:00 bis 22:10 Zone einschalten Innerhalb jeder der Minuten dieses Zeitraums besteht dann, innerhalb der jeweiligen Minute, eine Chance von 10%, dass die Aktion ausgeführt wird.
Anwendungsbeispiel
Für eine komplette Anwesenheitssimulation über an einen oder mehreren Abenden könnten Sie eine Automation dieser Art anlegen:
Bedingung Zeitraum Aktion Zufällige Ausführung Jeden Tag 18:34 bis 23:23 Zone einschalten für - Diese Automationen sorgen dafür, dass zwischen 18:34 und 23:23 unter Umständen ein Relais / eine Funksteckdose für eine von Ihnen definierte Zeit eingeschaltet wird.
- Nachdem der von Ihnen definierten Zeit wird das Relais / die Funksteckdose automatisch wieder ausgeschaltet und könnte erneut in diesem Zeitintervall durch die Automation eingeschaltet werden.
- Wenn Sie bei der "zufälligen Ausführung" noch das die Einstellung "garantierte Ausführung: an" wählen, wird die Regel spätestens in der letzten Minute des jeweiligen Intervalls ausgeführt. Dies erlaubt Ihnen sicherzustellen, dass ein Licht tatsächlich einmal an geht – bedeutet aber auch, dass eine solche Regel leichter als Simulation erkannt werden könnte.
- Sie können die Bedingung auch mit "Modus - Arm" kombinieren, so dass die zufälligen Ausführungen nur stattfinden wenn die Zentrale im Arm Modus ist.
Natürlich können Sie hier auch andere Abhängigkeiten definieren: z.B. nur unterhalb bestimmter Lux Werte.
Bitte beachten Sie, dass dies nur Beispielwerte sind, welche natürlich nicht in dieser Form 1:1 übertragen werden sollten.
last updated - 12/05/2017 Is the autmatic door lock "Nuki" supported by the XT2 Plus panel?
Yes, you can use the Smarthome menu to control the Nuki door lock. For this, you need a "bridge" to your door lock.
Connect the Nuki bridge to your WIFI and connect your door lock to the bridge. Memorise the bridge IP, port, and token (can be found in the Nuki app in the bridge menu)
Enter these information in the XT menu "Settings" → "Device integration":
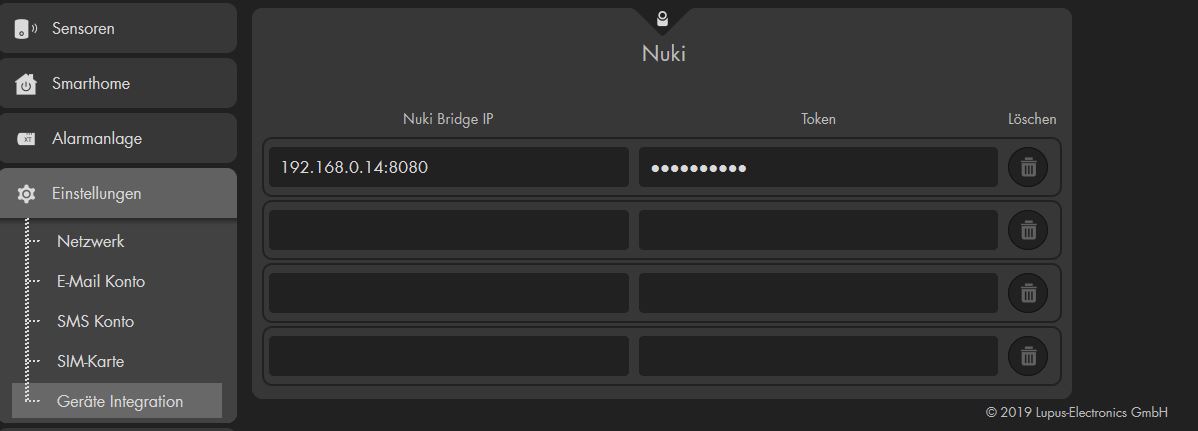
Mind the colon between the IP and the portNow, go to the menu "Sensors" → "Add" and klick in "start".
All door locks that are connected to your bridge are listed and can be added to the alarm panelYou can control the door lock via the menu "Smarthome" → "Wireless plugs" or create automation rules for the door lock in the menu "Smarthome" → "Automation".
Old version
NO LONGER REQUIRED WITH LATEST FIRMWARECommand to open:
http://IP-Adresse-Nuki:8080/lockAction?nukiId=123456789&action=1&token=123456Command to close:
http://IP-Adresse-Nuki:8080/lockAction?nukiId=123456789&action=2&token=123456The Nuki IP address, the ID, and the token are displayed in the bridge settings with the Nuki APP. API HTTP must be enabled.
last updated - 05/27/2019 Keypad - I cannot arm my alarm panel with the code 0000.
This code is used to connect the keypad to the alarm panel (installer mode). The PIN Codes to control the alarm panel can be set in the webinterface in the menu Home -> PIN Codes.
last updated - 03/22/2017 Outdoor and indoor siren do not sound an alarm
Please check if the alarm for the external sirens is enables in the menu "Alarm system" → "Siren settings" → "Alarm settings".
last updated - 05/27/2019 PIR motion detector - trouble shooting
Please heed to the following information:
- It is important that the PIR motion detector can only function properly if it is installed in the correct height. Please install it between 1.8 and 2 meters (5.9 - 6.56 ft)
- If the place of installation is higher, you need to adjust its orientation
- If you press the test button for about five seconds, the motion detector will enter into a test mode for three minutes and the led will flash each time a motion is detected
- After each detected movement, the motion detector enters a rest period for three minutes during which no further motions will be detected.
last updated - 03/22/2017 The outdoor siren (V1) does not stop
Please switch SW1 off again after you have added the siren to the alarm panel.
last updated - 03/22/2017 Userinterface extrem slow - Avast what to do?
Wenn die Alarmanlage extrem langsam reagiert, liegt dies in der Regel daran, dass ein Virenscanner die TLS 1.2 verschlüsselte Verbindung aufbricht. Da dies extrem rechenaufwendig ist, sorgt dies auch für extreme Verzögerungen im Seitenaufbau.
Wir empfehlen daher für die IP Adresse der Alarmanlage eine Ausnahme im Virenscanner hinzuzufügen.Um in Avast eine Ausnahme für eine IP Adresse hinzuzufügen, gehen Sie bitte folgendermaßen vor:
Öffnen Sie das Menü von Avast und klicken Sie auf "Einstellungen".

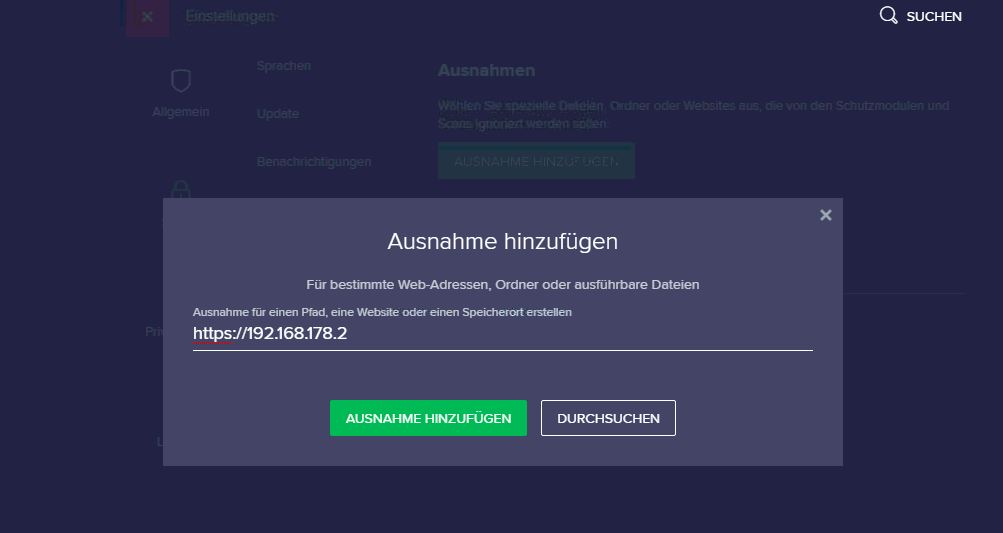
Gehen Sie dort in das Menü "Allgemein" → "Ausnahmen" und klicken Sie dann auf "Ausnahme Hinzufügen".
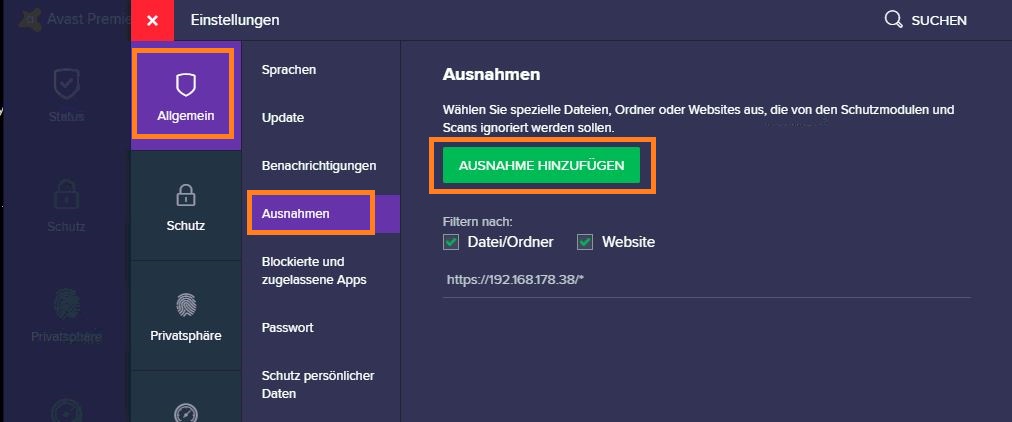
Geben Sie nun die IP Adresse Ihrer XT ein und klicken Sie danach auf "Ausnahme hinzufügen"
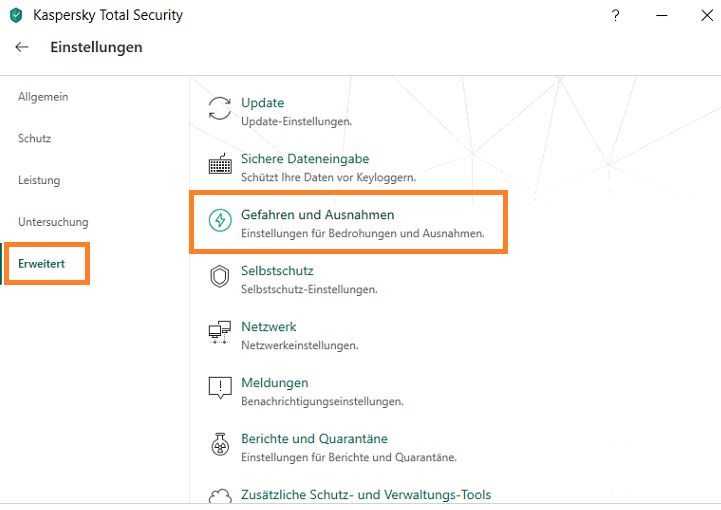
last updated - 06/04/2019 Userinterface extrem slow - Kaspersky what to do?
Wenn die Alarmanlage extrem langsam reagiert, liegt dies in der Regel daran, dass ein Virenscanner die TLS 1.2 verschlüsselte Verbindung aufbricht. Da dies extrem rechenaufwendig ist, sorgt dies auch für extreme Verzögerungen im Seitenaufbau.
Wir empfehlen daher für die IP Adresse der Alarmanlage eine Ausnahme im Virenscanner hinzuzufügen.Um in Kaspersky eine Ausnahme für eine IP Adresse hinzuzufügen, gehen Sie bitte folgendermaßen vor:
Öffnen Sie die Einstellungen Ihres Kaspersky und klicken Sie auf "Erweitert" → "Gefahren und Ausnahmen"
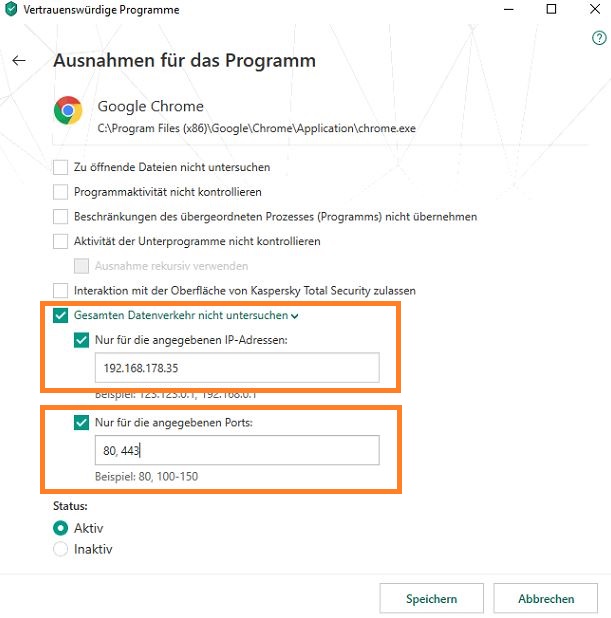
Gehen Sie nun in das Menü "Vertrauenswürdige Programme angeben" und wählen Sie dort Ihren Browser aus
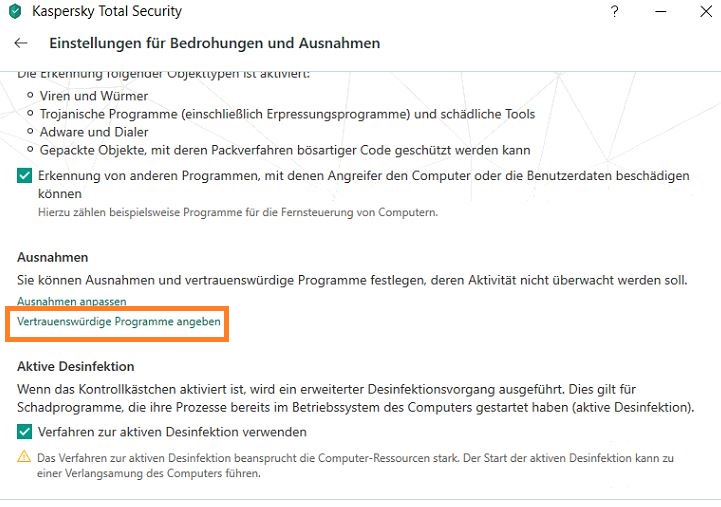
Da die Ausnahme ja nur für die IP Adresse der Alarmanlage gelten soll, aktivieren wir unter "Gesamten Datenverkehr nicht untersuchen" die Option "Nur für die angegebene IP-Adressen" und geben die IP Adresse der Alarmanlage ein.
Unter "Nur für die angegebenen Ports" schränken wir die Ausnahme noch weiter ein, so dass nur die für den Zugriff relevanten Ports dort zu finden sind (80, 443). Wenn Sie diesen Rechner für den Fernzugriff auf die Alarmanlage verwenden, geben Sie hier bitte auch noch den von Ihnen freigegebene externen Port an (z.B. 53080)
last updated - 06/04/2019 Why does Safari not accept the SSL certificate?
Damit das Zertifikat der XT korrekt von Ihrem Safari Browser akzeptiert wird, gehen Sie, nach der ersten Bestätigung des Zertifikats, bitte folgendermaßen vor:
- Gehen Sie zu den gespeicherten Zertifikaten in Ihrem Schlüsselbund
- Gehen Sie zu "Vertrauen"
- Wählen Sie "Bei Verwendung dieses Zertifikats" → "Immer vertrauen" aus
last updated - 01/30/2018 Why does the alarm panel still display low battery after I have changed the batteries of a sensor?
When you change the batteries, we advice to discharge any residual voltage. Press the learn button of the sensor a few times before instering the new batteries.
last updated - 03/22/2017 Show all FAQ's - Reviews
-
There are currently no product reviews.